Table of Contents
Introduction
If you want to experiment freely with WordPress, it is probably best to run it locally so you can do whatever you like without worries. To do so, you can just configure a webhost locally, run php, mysql/mariadb, download WordPress and install it.
In this case however, I would like to run a copy of a remote WordPress website locally. There are multiple ways to do this, this shows one way. This probably works the same for other hosts, but in this particular case it’s from Hostinger.com.
Download Files
Download the public_html files from the WordPress installation of the domain you want to run locally. You can do this by logging in to your hosting provider and go to the files of your website. FTP or SSH may work as well. Either way, if your directory contains directories like: wp-admin, wp-content and wp-includes, you’re likely having the right directory. You need the entire contents of the directory where WordPress is installed.
Export Database
Your hosting provider should have a way to export your database. With Hostinger for example, one way to do it is to go to your domain, then to databases and then open phpMyAdmin. Click on Export tab on top, select Quick as method, SQL as format and click on the Export button. You should now download a .sql file.
Install Webserver
Use any webserver you like. I used XAMPP to host WordPress locally. XAMPP comes with Apache, MySQL and PHP. Instead of MySQL, MariaDB can be used as well if you run it as a separate service. If you use Windows, it’s something like:
winget search xampp
winget install ApacheFriends.Xampp.8.2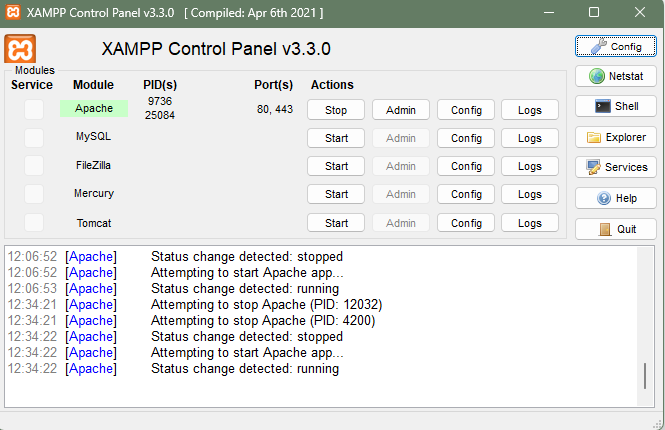
Create and Configure Database
Run Downloaded SQL
Create a MySQL (or MariaDB) database. I usually am lazy with such a step and use a tool like MySQL Workbench or HeidiSQL. In this case, I used MySQL Workbench. In MySQL Workbench, create a new schema, then click on File -> Open SQL Script and execute the SQL script in the newly created database. The contents of your online hosted website should now be copied to your local database.
Create Local Admin Account
In MySQL Workbench, select the wordpress database (whatever you called it) and create a new SQL tab to run the following scripts to create a new local admin account with password as password:
INSERT INTO `wp_users` (`user_login`, `user_pass`, `user_nicename`, `user_email`, `user_status`)
VALUES ('admin', MD5('password'), 'Local Admin', 'admin@example.com', '0');

INSERT INTO `wp_usermeta` (`user_id`, `meta_key`, `meta_value`)
VALUES (LAST_INSERT_ID(), 'wp_capabilities', 'a:1:{s:13:"administrator";s:1:"1";}');

INSERT INTO `wp_usermeta` (`user_id`, `meta_key`, `meta_value`)
VALUES (LAST_INSERT_ID(), 'wp_user_level', '10');Alter wp_options
In MySQL Workbench, right click on the database and click Refresh All. Unfold the tables with the arrow button and find the wp_options table. Right click on it and select: Select Rows – Limit 1000
In the result grid, find option_name: siteurl and home, both should be set to http://wp.local exactly. (We will configure a virtual host later)
Copy Website Files
Navigate with a file Explorer (or cli) to C:\xampp\htdocs, or wherever you installed xampp. htdocs is the root directory of the Apache webserver. Create a new directory, with a name like “wordpress” in the htdocs directory and copy the files downloaded from your webhost to this directory.
Remove
- Remove any plugins in wp-content/plugins from hostinger (or your hosting provider)
- Remove any caching and security plugins as well, such as litespeed and all-in-one-wp-security-and-firewall. (You can try without removing these, but if your website has troubles or issues, it may be because of these plugins)
- Remove an existing .maintenance file.
- Remove the object-cache.php file in the wp-content directory.
Configure .htaccess
Replace contents of .htaccess with:
<IfModule mod_rewrite.c>
RewriteEngine On
RewriteBase /
RewriteRule ^index\.php$ - [L]
RewriteCond %{REQUEST_FILENAME} !-f
RewriteCond %{REQUEST_FILENAME} !-d
RewriteRule . /index.php [L]
</IfModule>
Configure WordPress
XAMPP should have created a default MySQL account with root as username and no password, thus an empty one. In the root of your local WordPress website at htdocs/wordpress, open wp-config.php:
define( 'DB_NAME', 'wordpress' );
define( 'DB_USER', 'root' );
define( 'DB_PASSWORD', '' );

// also add this, we will use it later
define('WP_HOME','http://wp.local');
define('WP_SITEURL','http://wp.local');Virtual Host
I configured a virtual host in Apache (XAMPP) to make life easier. Navigate to: C:\xampp\apache\conf\extra and open httpd-vhosts.conf with a text editor such as notepad or Notepad++. Add the following to create a virtual host with specified server name.
<VirtualHost *:80>
    DocumentRoot "C:/xampp/htdocs/wordpress"
    ServerName wh.local
	<Directory "C:/xampp/htdocs/wordpress">
		AllowOverride All
		Require all granted
	</Directory>
</VirtualHost>
Open the hosts file in Windows: C:\Windows\System32\drivers\etc\hosts with Notepad(++) as well and add:
127.0.0.1 wp.local
Referring to wp.local in your webbrowser will now navigate to your htdocs/wordpress directory as root for this local domain.
Remember to restart the Apache webserver first, click stop and then start behind Apache in XAMPP.
Conclusion
The local WordPress copy should now run locally on the Apache (XAMPP) webserver. You can try it by navigating to wp.local in your webbrowser. You can login with the newly created admin account at wp.local/wp-admin where you can enter the credentials.