Table of Contents
Introduction
While there are several ways to access a GitHub repository, the Personal Access Token is maybe the easiest one to setup. I try to explain in a few steps how to do it in a desktop environment.
Steps
https://github.com/<username>/<repository_name>
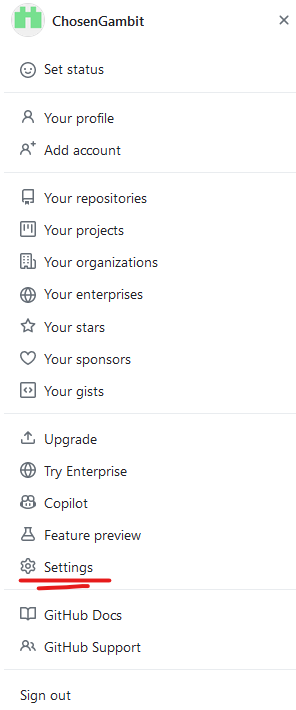
Go to Settings
You will find Settings in the top right menu of the screen (on desktop):

Go to Developer settings
There is a long menu in left side of the screen, down below you will find Developer settings
Tokens classic
As for 15 January 2024 tokens classic still work. Click on Personal access tokens and then on Tokens (classic)
Here you click on Generate new token followed by a click on Generate new token (classic).
Create the token
Fill in a note, expiration date, and the scope of the token. For a private repository, usually the repo choice on top including all sub-choices will suffice. Of course you can select any other scope according to what you want and need before clicking on Generate token down below.
The token looks something like:
ghp_##################################
Setup the token with Git Bash
git clone https://<ghp_token>@github.com/<user_name>/<repository_name>.git
Or
git clone https://<hostname>/<user_name>/<repository_name>.git
Then, when prompted with username and password, give the gph-token as your password.
Or update your existing token:
git remote set-url origin https://<token>@github.com/<username>/<repository>.git
Conclusion
This concludes the setup for a personal access token for a GitHub repository. Remember there is also the official documentation.
More information
If you need to get a better grasp at Git, you can try if these analogies work for you.
If you need an access token for BitBucket instead of GitHub, you can try to post instead.


