Introduction
This post shows how to clear and clean an USB stick entirely to start over. In this case, I will create a bootable USB drive, suitable to Flash a BIOS. If we right click on the windows start menu icon and select Disk Management from the menu, we will see an overview of all disks available on the system.

Using DISKPART
DISKPART is a command-line tool in Windows that allows you to manage your hard drives, disks, partitions, and volumes. We’ll use it to re-initialize our USB stick from the image in the introduction. Open a PowerShell terminal with administrator rights. To do so, open the start menu and type in “powershell” and select run as administrator. Type “diskpart” in the terminal to start it:
PS C:\WINDOWS\system32> diskpart

Microsoft DiskPart version 10.0.26100.1

Copyright (C) Microsoft Corporation.
On computer: COMPUTER

DISKPART>Select & Clean Disk
Before you continue, make back-ups first!
DISKPART> list disk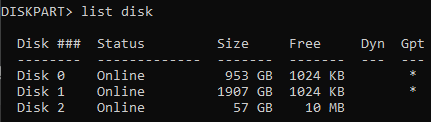
It is important to realize that if you select the wrong disk here, it will wipe out the wrong disk. Be triple sure to select to correct disk. In this case, it’s disk 2.
DISKPART> select disk 2

Disk 2 is now the selected disk.

DISKPART> clean

DiskPart succeeded in cleaning the disk.If you look in Disk Management, you will see a disk with unallocated space.

Set The Partition Table
The cleaned disk can be seen as an empty (bulldozed) plot of land. To be able to use the land, we need to know where the land is and what the boundaries are. This is more or less what converting to a partition table does, it’s like creating of map of the land.
The convert command writes metadata about the disk itself on the disk. This metadata will (at least) be written to the very first readable sector of the disk; this is by convention. So, after the convert command, we basically now have a map plus a convention of creating fences on our land, which refer to partitions in this analogy.
DISKPART> convert mbr

# or

DISKPART> convert gptMBR (Master Boot Record)
MBR is an older partition table style. It can have a maximum of 4 partitions and 2 Terabyte per disk. It’s usually only necessary to choose MBR if you want to use your disk with old hardware or if you want to use an USB stick for BIOS flashing. I chose MBR for this last reason.
GPT (GUID Partition Table)
A newer partition table style. It supports to over 9 Zettabytes and can have 128 primary partitions. GPT uses 64-bits compared to the 32-bits used by MBR. GPT is more secure, because it will write a backup copy on the last sectors of the disk as well and is self-healing. To be able to boot from GPT, UEFI firmware is required.
Create Partition
So far, Windows can’t use this disk yet.
A partition can be seen as a fenced piece of land subtracted from the total plot. In the older MBR terminology, there are primary and extended partitions. Only a primary partition can be marked active, so it can hold a bootable operating system. With GPT, essentially all partitions are primary.
Without size=<size in megabytes>, the rest of the space will be used by the partition. We choose 4000MB here, because it can’t be bigger for a FAT32 file system.
DISKPART> create partition primary size=4000

# or

DISKPART> create partition primaryAfter the last command, Windows allocated the space.

Format The Drive and Choose a File System
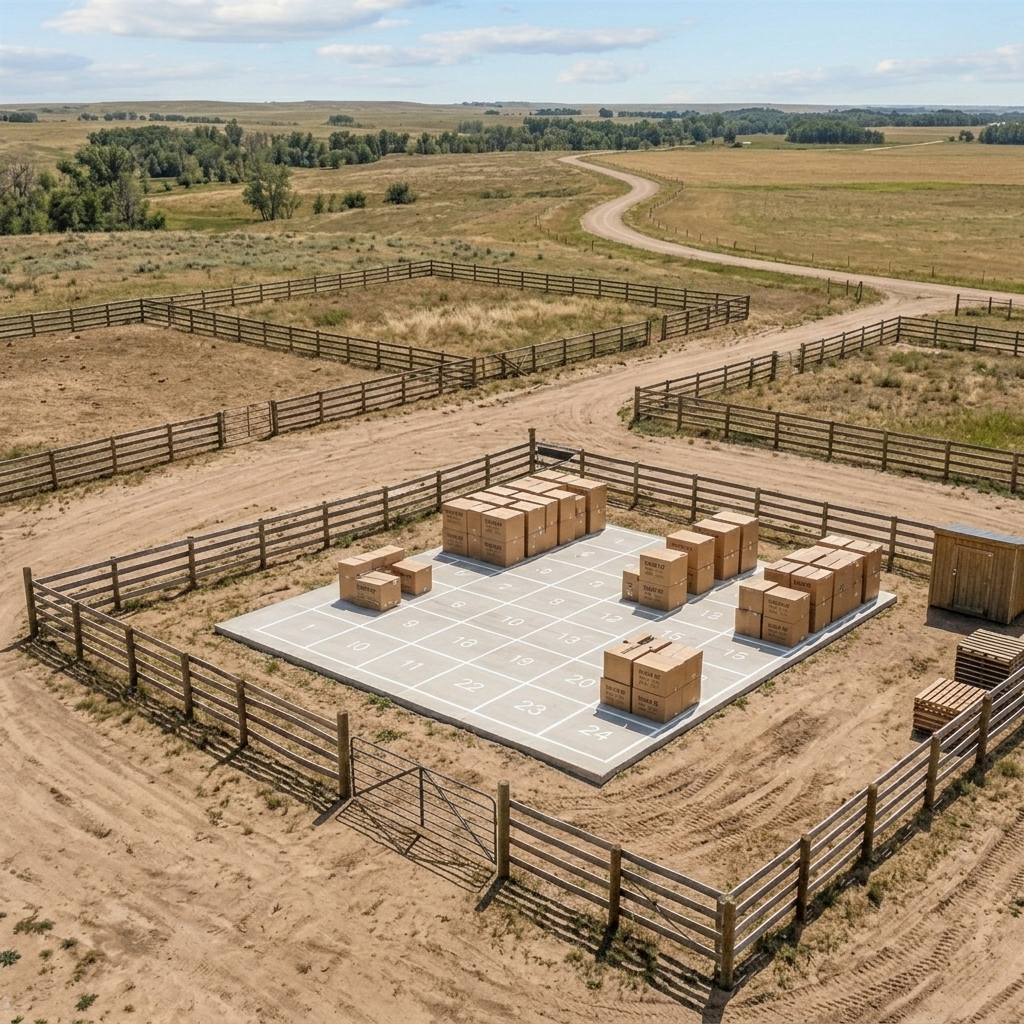
The land plot is fenced, with one big fence around the entire plot. Now we will create the File System, which is a way of how data is managed on the disk. The RAW partition is unorganized so far, as if you were to store boxes randomly on the land. The File System will create a storing methodology, like a concrete slab with lines and numbers on them.
File System Types
- FAT32: Max file size = 4GB. Suitable for BIOS flashing. Simple.
- NTFS: Proprietary Windows. Tracks everything.
- exFAT: Compatible with Mac, Linux and Android. As good as NTFS.
Before we can assign a file system, we need to select a partition first.
DISKPART> list partition

DISKPART> select partition 1

# E.G.:

  Partition ###  Type              Size     Offset
  -------------  ----------------  -------  -------
* Partition 1    Primary           4000 MB  1024 KB
With the partition selected, we can now format and set the file system.
DISKPART> format fs=fat32 quickAssign Drive Letter
To assign a drive letter and mount point:
DISKPART> assign
Summary
Create Bootable USB for BIOS Flashing
Be aware that this wipes your disk.
diskpart
list disk
select disk #
clean
convert mbr
create partition primary size=4000
list partition
select partition 1
format fs=fat32 quick
assign8TB Disk in Four 2TB Partitions
Be aware that this wipes your disk.
diskpart
list disk
select disk #
clean
convert gpt
create partition primary size=2097152
format fs=ntfs quick label="Data_A"
assign
create partition primary size=2097152
format fs=ntfs quick label="Data_B"
assign
create partition primary size=2097152
format fs=ntfs quick label="Data_C"
assign
create partition primary
format fs=ntfs quick label="Data_D"
assign
list volumeLoose Ends
- There are other partition tables available in Windows, which are not discussed here. These are Basic and Dynamic.
- This cleaning process of the disk does not mean that data on it is permanently lost, it is just that the floor plan has been wiped. The files are still on there and can be recovered.
- A Partition is a physical slice of disk, while a Volume is an identity which can be over multiple disks and partitions, which makes it more like a “logical container”. A Volume can therefore be 8TB but be made out of two 4TB physical disks.
Conclusion
We have cleaned a drive which can be seen as bulldozing a plot of land. We then selected a partition table, which can be seen as choosing a map type for the land to access. Then we created a partition, which can be seen as a piece of fenced off land following the rules of the partition table. The file system then decides how we store and access data on the land.