(TL;DR at the bottom)
Table of Contents
Introduction
Somewhere around June 2015 access tokens were introduced by Atlassian for authenticating git over HTTPS with bitbucket. As of March 2022, it became mandatory. Using a username and password to authenticate was no longer possible. Because I am not daily creating new repositories, I tend to forget how to do it exactly almost every year or so.
A repository access token is connected to a repository, not to a user. They are used to authenticate with the bitbucket API’s and perform actions on a repository.
In this particular case, I want to store a local existing project into a remote repository. But you can follow this tutorial as well for just cloning the remote repository to your local computer.
The local git project
I assume the local git project has been initialized and there are files added and committed into to repository. E.g.:
git init
git add .
git commit -m "First commit"Creating an empty repository on Bitbucket
When creating a new repository on the Bitbucket.org website, make sure to not include a readme and not include a .gitignore file. Because doing so will likely create a conflict with the local git repository immediately. It’s convenient to leave the repository completely empty. You can create a new repository by just clicking Create followed by Repository and fill in the form.
Creating the access token on Bitbucket
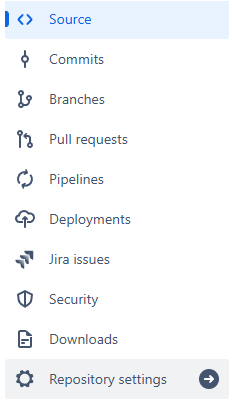
Select the repository in Bitbucket by clicking on it. Then, in the menu at the left we need to go to the Repository settings (bottom of the list) to go a step deeper.

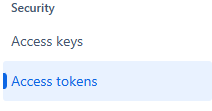
After clicking, the menu will be replaced with a new menu. In this menu we can find the Access tokens menu item under the Security category.

After clicking the Create Repository Access Token button a popup will appear where we can make the token.

The popup will ask us to provide a name for the access token and about scopes.
Diving into the scopes documentation
In order to understand what functionality each scope checkbox represents, we have to dive deeper into the documentation. This information is of course on the Atlassian website and can be subject to change over time. But at this moment we need to know the following (which is partly copied and pasted from the Atlassian website):
Read
Equivalent to the repository API scope.
Provides access to view repositories, including the source code, Issues, and Wiki. This does not include pull requests.
Write
Equivalent to the repository:write API scope.
Provides access to modify repositories, including the source code, Issues, and Wiki. This does not include pull requests.
From the Atlassian website
This documentation (above) refers to the documentation below.
repository
Provides read access to a repository or repositories. Note that this scope does not give access to a repository’s pull requests.
- access to the repo’s source code
- clone over HTTPS
- access the file browsing API
- download zip archives of the repo’s contents
- the ability to view and use the issue tracker on any repo (created issues, comment, vote, etc)
- the ability to view and use the wiki on any repo (create/edit pages)
repository:write
Provides write (not admin) access to a repository or repositories. No distinction is made between public and private repositories. This scope implicitly grants the
repositoryscope, which does not need to be requested separately. This scope alone does not give access to the pull requests API.From the Atlassian documentation
- push access over HTTPS
- fork repos
Choosing the right settings
Notice that a pull command, to pull data from a branch of the repository is not the same as a repository’s pull request where another person with access to the repository finished a piece of code and files a pull request.
Select Read and Write under Repositories to be able to pull from and push to remote.

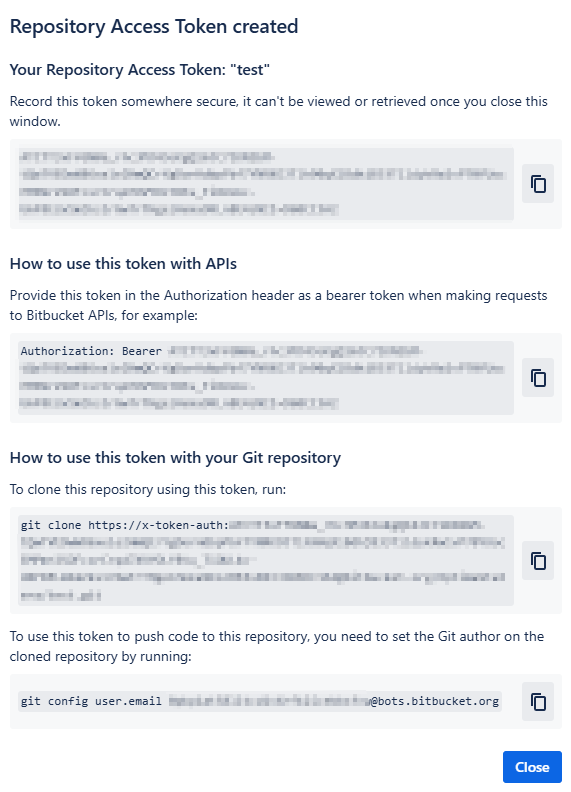
When the token is created, you have a one-time chance to copy and/or store it somewhere or else it will be lost forever and you will have to create a new one.

Pushing the local repository to remote
Now that we have a local (filled) repository and an empty remote repository, we are going to sync them. Go to the directory where your local repository is, and enter the following command with git bash. You have to replace the <TOKEN>, <USERNAME> and <REPOSITORY_NAME> with your own.
git remote add origin https://x-token-auth:<TOKEN>@bitbucket.org/<USERNAME>/<REPOSITORY_NAME>.gitFinally alter the user.email config setting as the documentation tells us, although it seems this is not mandatory to authenticate with the repository.
git config user.email <CODE>@bots.bitbucket.orgWe can now push our code to remote.
git push origin mainShould work. Be sure that the main branch is the one you want to push though.
Cloning
If you do not have a local repository to sync with, you can use the git clone command that is shown to you after creating the access token.
Renew Expired Token
If a token has been expired, you can “rotate” the token in Bitbucket and a new token will be created. to use this new token in git you can:
git remote set-url origin <url>
Where <url> is:
https://x-token-auth:<TOKEN>@bitbucket.org/<USERNAME>/<REPOSITORY_NAME>.git
Conclusion
In order to be able to push and pull from a remote Bitbucket repository with git, we need to set up an access token to authenticate.
TL;DR Quick Guide
- In Bitbucket, click on a repository.
- Go to Repository settings in the menu.
- Click on Access tokens in the next menu.
- Click on Create Repository Access Token.
- Choose the Read and Write scopes under the Repositories header to be able to push and pull.
- Click on Create.
- Add the token to a local repository with the git remote add origin command:
git remote add origin https://x-token-auth:<TOKEN>@bitbucket.org/<USERNAME>/<REPOSITORY_NAME>.git
- (or clone the repository with git clone)
- Alter the user.email:
git config user.email <CODE>@bots.bitbucket.org


