Table of Contents
Introduction
Use case
A good friend of mine occasionally needs to install the same bunch of applications on freshly installed Windows 10 and Windows 11 computers locally. Instead of doing so manually, by downloading the installer and going through each installation step using a graphical user interface, I tried to automate Winget installations using PowerShell. This way, the scripts will automatically install Winget and its dependencies, followed by a predefined list of applications. In the ideal case, only two terminal commands take care of everything.
What is winget
Winget is a package manager for the Windows operating system, made by Microsoft. The Microsoft website defines a package manager as a system or set of tools used to automate installing, upgrading, configuring and using software.
Advantages of package managers
With a package manager you can easily maintain versions and dependencies of the software. For instance, if the software needs other software to function, the package manager (usually) takes care of installing that too. If you learn some commands via the terminal, it can greatly reduce the time you need to install the software you need.
Winget might not work out of the box
On a fresh installation of Windows, I’ve seen a lot of cases that the package manager does not work out of the box. Although a Windows machine might have Winget preinstalled, the Winget software version is usually outdated and might not work.
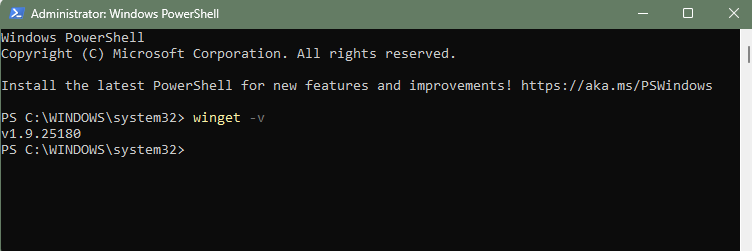
In a PowerShell terminal (version 5.1 or higher, enter: $PSVersionTable to check the version), run the following command to check if Winget is installed on your system: winget -v

Winget is not installed if you see an error instead of a version number.
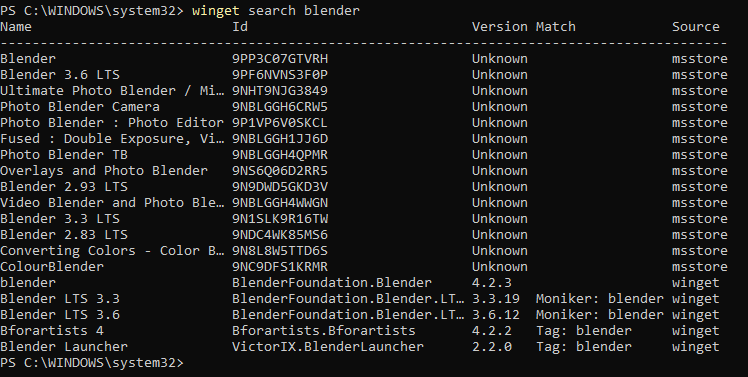
To check if Winget works as intended, we can try to search for packages. Use the winget search command to search. For instance, using winget search blender should print a list of applications.

If this command did not print a list with applications, your Winget installation does not work properly and likely needs to be updated. What I noticed, is that it then usually prints out a \ (backslash) only, to indicate that it did not find anything.
If Winget is not installed or does not lists packages, you could download and install a newer version of Winget manually, or continue reading to do it automatically.
Method 1: Using the PowerShell Scripts to automate the entire process
To make the automation of installing applications as easy as possible, I’ve written a PowerShell script that automates everything you need. This means it installs Winget including the prerequisites/dependencies. It does a bunch of other things as well, such as comparing the local Winget version with the most recent one online.
Side note
The PowerShell script on Github is a personal project to structure and manage PowerShell scripts. It can be subject to change in the future. Use of this script is at your own risk and no rights can be derived from it.
Step by step
Download the script
First, download the script (or use git)
Unzip the script
Unzip the file to a local directory on your computer. Be sure that if you open the unzipped PowerShell-Structure-main directory, that there is not another directory nested with the same name (PowerShell-Structure-main) inside. To prepare for the next step, be sure that if you open the PowerShell-Structure-main directory, you can see a bunch of files, such as Manifest.psd1 and Root.psm1.
Create a run.ps1 file
In the same directory as that the PowerShell-Structure-main directory is present, create a run.ps1 file and open it with a text editor, such as notepad. Add the following line to it, including the dot in front. Save the file and close the text editor.
.$PSScriptRoot\PowerShell-Structure-main\workflows\winget\main.ps1Create an apps.txt file
Create an apps.txt file as well and add the applications id’s of Winget packages you would like to install, e.g.:
TeamViewer.TeamViewer
Google.Chrome
Adobe.Acrobat.Reader.64-bit
Save and close the file. Your files should look like the following in Windows Explorer:

Run the script
Before you continue to actually run the script, realize that this will actually install TeamViewer, Google Chrome and Adobe Acrobat.
Open a PowerShell terminal with Administrator rights. Navigate to the path where your run.ps1 file is at. Now you have to do only one thing before running the script and that is to set the Execution-Policy to Bypass, which means your will not be prompted by the terminal in any way. After that you can run the script.
Set-ExecutionPolicy Bypass -Scope CurrentUser
.\run.ps1What the script does
In broad terms, the script will do four things and four consecutive terminals will be opened. The first one will check and install the Winget prerequisites. The second will install Winget. The third will install the apps in the apps.txt with Winget, and the fourth will try to clean up files it downloaded and extracted. The different processes will append logs to an output.log file that will be created in the same path as your run.ps1 file.
Create an USB-Stick
If you want to create an USB-stick to be able to use this script on other Windows computers, you can copy the prepared files together with the PowerShell-Structure-main directory and run the the script from there. This means setting the execution policy and run the run.ps1 script from the USB-drive with a PowerShell terminal.
Install other applications
If you want to install other applications, you can alter the apps.txt file and add a winget search application ID to the file. You can look at the winget search blender command (screenshot image) before to notice that we could add: BlenderFoundation.Blender to our apps.txt if we would want to install Blender. Remember, if Winget does not work properly, you are not able to search (yet).
Method 2: Manually controlling the scripts
Instead of doing everything automatically by creating the run.ps1 file which invokes another file, you can also control the scripts yourself. So after you have downloaded the PowerShell scripts, and for example extracted its contents to D:\ you can do the following:

# Set execution policy to bypass
Set-ExecutionPolicy Bypass -Scope CurrentUser

# Import the Root module, when prompted enter R to Run Once
Import-Module .\Root.psm1

# Automatically imports other modules
Initialize-Modules

# Tries to install Winget without installing prerequisites
Initialize-Winget -InstallPrerequisites $false

# Tries to only install the prerequisites of Winget
Initialize-Winget -InstallWinget $false

# Tries to install the prerequisites and winget both
Initialize-Winget

# Installs Applications with Winget, with the following ID's
Install-WithWinget -AppNames "TeamViewer.TeamViewer", "Adobe.Acrobat.Reader.64-bit"

# Installs Applications with Winget, with the ID's out of a text file
Install-WithWinget -File .\app.txt

# Merge AppNames and File content together
Install-WithWinget -File .\app.txt -AppNames "GIMP.GIMP", "Mozilla.Firefox"Method 3: Manually using only Winget
Of course you don’t have to use these PowerShell scripts to achieve the same results. You can just install Winget and the dependencies manually and use a command like the following to install multiple applications:
winget install TeamViewer.TeamViewer GIMP.GIMPConclusion
To meet the requirements of the use case, I tried to create a way to automate winget installations with the help of PowerShell. To automatically install a list of applications with Winget, as quickly as possible. In an ideal case it does not cost more time than to just enter two commands and walk away until it’s done. The script may be prone to some change in the future. The repository the scripts are currently in, was not made for, and is not dedicated to the purpose of this use case.


