Table of Contents
Introduction
This shows how to setup an SSH public and private key for authenticating with Bitbucket. This lets you interact with Bitbucket in a secure way. There are multiple ways to do it, this shows one way. You could also use the Bitbucket documentation.
Prerequisites
Install OpenSSH on Windows
If you installed Git on Windows with the Git Bash Environment, then OpenSSH should be installed along already as well.
You could also use winget to install git.
With PowerShell:
Get-Service -Name sshd | Set-Service -StartupType Automatic
Start-Service sshdOr use the Microsoft Documentation.
Install OpenSSH on Debian/Ubuntu
sudo apt update
sudo apt install -y openssh-server
sudo systemctl enable --now ssh
sudo systemctl status ssh

# Firewall allowance
sudo ufw allow OpenSSH
sudo ufw reloadGenerate Key
The private key will stay on your local machine and should not be shared with anyone else. I recommend using Git Bash (Installed along with Git) on Windows. If you chose to have Git Bash in the Windows Explorer context menu, you could Shift + Right click in the directory to open a Git Bash terminal there.

# You could choose another key type such as rsa (instead of ed25519).
# Fill in the email address you use at Bitbucket
ssh-keygen -t ed25519 -C "<your email address>"You will be prompted to enter a file to save the key, choose a directory or press enter to use the default.
Then you will be prompted to provide a password, but you can choose to leave it empty as well.
Start SSH-Agent
The SSH Agent must run in order to use the SSH Key. Do so by running in Git Bash:
eval $(ssh-agent)or PowerShell:
Start-Service ssh-agentAdd SSH Private Key to Agent
When we generated the public and private key, two files were created. For instance, if we entered the file name: id_ed25519 our private key will be in there. The public key will be in id_ed25519.pub.
# Provide the correct path to the file with private key
ssh-add ~/.ssh/id_ed25519or PowerShell:
ssh-add $env:USERPROFILE\.ssh\id_ed25519Add Public Key to Bitbucket
- Login to Bitbucket.
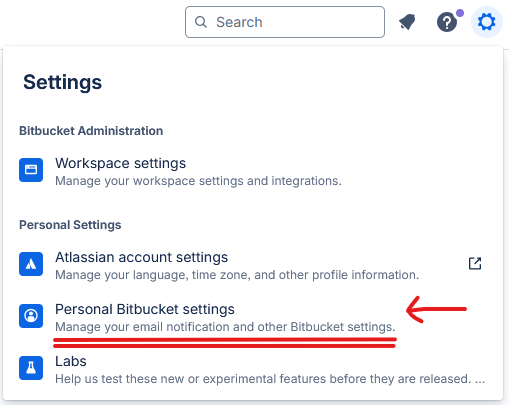
- Click on the Cog icon in the top right of the screen.
- Click on Personal Bitbucket settings.
- In the Menu left, click on SSH Keys.
- Click on Add Key.
- Provide a Name for your own reference.
- Open the previously generated public key file on your local computer (e.g. id_ed25519.pub) with a text editor, preferably Notepad (or something like Nano on Linux).
- Paste the entire content of the *.pub file, thus the public key, inside the SSH Public Key dialog on Bitbucket.
# public key example
ssh-ed25519 AAAAC3NswHzVqQ7L7B07LzIJbntgmHqrE40t17nGXL71QX9IoFGKYoF5pJKUMvR+fi/Z/X user@example.com
- Choose an expiry date or no expiry.
- Click on Add Key and the key is added.
Check SSH Key
On your local computer check with:
ssh -T git@bitbucket.orgIf it was successful, you can now communicate with any remote repository on Bitbucket you have access to.
Conclusion
We generated a public and private key locally. Then we added the public key to Bitbucket in order to be able to authenticate. If you want to login using an access token, you can try this article instead. Or maybe you want to refresh the most common git commands instead.