Table of Contents
Introduction
Years ago I used JavaFX, which is a toolkit for building a Desktop GUI. This was some versions ago and I remembered that it was not very straightforward to make it work together with NetBeans. It seems like it still isn’t (or did I miss something?).
To run my older JavaFX project I need to set it up again, and I notice that I forgot how to do it. So once again, I looked into it, and this time I am writing it down. At the moment both NetBeans and JavaFX are at version 23.
Install NetBeans
I am currently working on a computer with Windows 11 installed, to install NetBeans I use winget:
winget install netbeans
Alternatively, you can also manually use these PowerShell scripts to install winget and prerequistes:
Set-ExecutionPolicy Bypass -Scope CurrentUser
Import-Module .\Root.psm1
Initialize-Modules
Initialize-Winget
Install-WithWinget -AppNames "netbeans"
I assume Linux users know their way around their distro and package managers.
Add the JavaFX library
To NetBeans
You can download JavaFX from the Gluon website. Extract the files to a folder on your computer.
- In NetBeans, go to Tools -> Libraries and click on New Library… and give the new Library a name and click OK.
- With the new library selected, click on Add JAR/Folder…
- Navigate to the extracted JavaFX files, and add all .jar files from the lib directory. Click Add JAR/Folder.
- Click OK to close.

To your project, Compile and Run
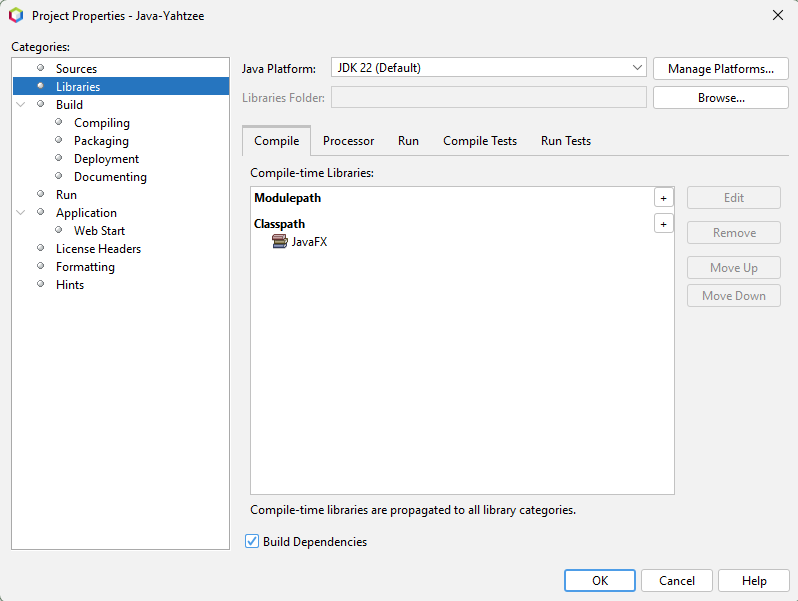
Now, we have to add the library to your project. If you do not have a project yet, you can create one. Be sure to not select a JavaFX project.
- Right click on your project in the Projects view. Click on Properties.
- Go to Libraries and go to the Compile tab.
- Add the library to Classpath. (Click on the + symbol)
- Select the JavaFX library and click Add Library
- Click on the Run tab, and add the JavaFX library to the ModulePath there.
Compile on save
With the Project properties still open:
- Go to Build -> Compiling and add a check to the Compile on Save checkbox.
VM Options
Still in Project properties:
- Go to Run in the menu left
- Add the following to the VM Options, where you should replace to path below to the location of JavaFX on your computer.
--module-path "C:\Users\<username>\Documents\javafx-sdk-23.0.1\lib" --add-modules javafx.controls,javafx.fxml

JavaFX is now added to your project and can be used.
Demo project
The Demo JavaFX application is a version of the game Yahtzee, created with a Ant Java Application template in NetBeans. Also take note that there is a JavaFX Scene Builder available. For writing Unit Tests, I add the following libraries to the Compile tests classpath in the Project Properties: JUnit 4.13.2 and Hamcrest 1.3
Conclusion
We downloaded and installed NetBeans with Winget, downloaded and extracted JavaFX and added the JavaFX libraries to NetBeans and our Java project. To do so, we added it to our compiling classpath and our run modulepath. We selected Compile on Save and added the JavaFX modules to the VM Options.